Motor
This was an amateur body-off restoration project on a 1969 Chevrolet Impala. (all pictures are thumbnails, click to enlarge). The total time of the work was about 18 months starting in the summer of 2001. The goal was to learn by doing and end up with a nice looking car in the end. This is a true daily driver with 225,000 miles on it at the time of the rebuild.
Use the links at left to go straight to a topic. The general arrangement is in the order the work was done
The pictures below show key aspects of the restoration with a short description. The Bold underlined links will bring you to a page (also listed at left) with much more detail.
I "restored" this car in 1994 but the work was mostly superficial. It included reworked junk yard fenders from Arizona, sheet metal, pop rivets and body filler. I painted it and it looked nice until recently when the hidden problems started to reappear. This time around was a TOTAL rebuild of the car. I made some cosmetic modifications from factory stock but retained the basic appearance. The trans was replaced with a 700-R4 to compliment previous performance changes. The motor was also not touched since it had been worked on in 1998 and is still running strong.
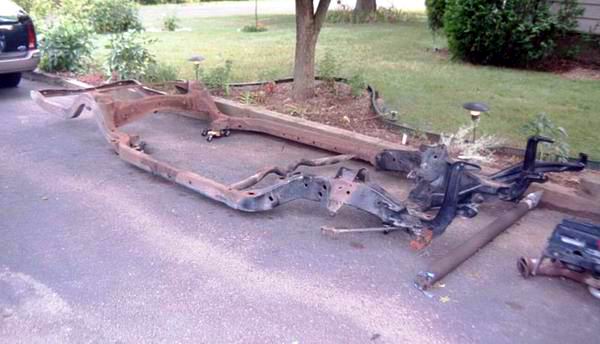
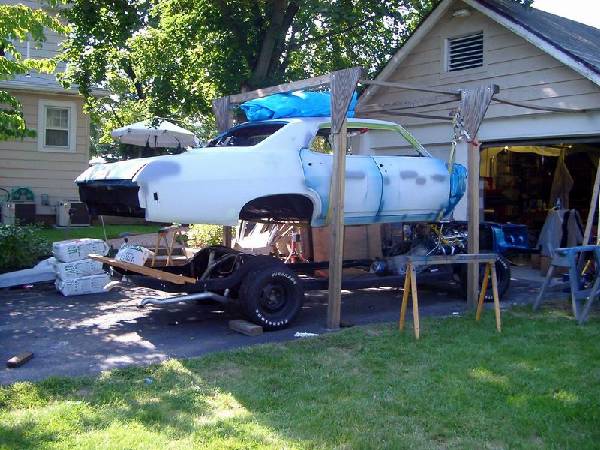
| I tore the car down to what you see in this picture and rebuilt everything as I went.
|
Here is the final result. There are more pictures of the finished car in the gallery at left.
|
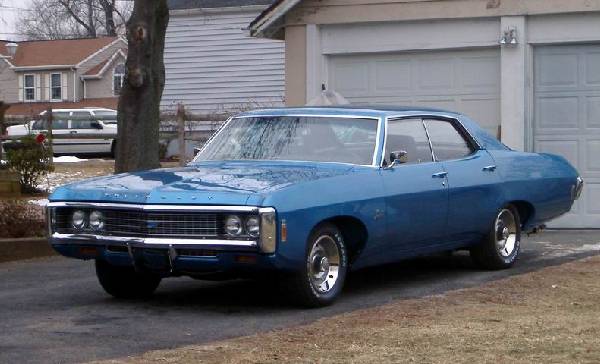
The primary problem with the car was serious rust in the rear wheel wells, fenders, trunk and lower quarter panels. The corner behind the rear doors, and the rocker panels below, were also bad at the back. The front lower portion of the cowl and the front fenders were also problem areas. Other problems were spots on the front corner of the roof by the front windshield, small parts of the floor, particularly by the front frame mount reinforcement, the base of the windshield and a spot by the rear sail panel area of the roof.
The interior was also only fair with most surfaces faded from the sun and worn but intact. The color was originally Sea mist green with a medium green interior. The new color is LeMans blue with a black interior.
Special thanks to Len Stewart and the Autobodystore.com BBS discussion board. This site is a superb resource for all kinds of advice on bodywork. Both pros and skilled amateurs provide lots of advice to help anyone with questions
| Started July 2001. I TOTALLY disassembled the car. The body was lifted off and put aside. The frame was done first. the springs and bushings were replaced and upgraded. The front sway bar was upgraded and one was added to the back. There were some cracks and corrosion in the frame that needed repair
More details about disassembly and frame repair The engine was not touched except for paint. |
 |
| Final chassis work done, October 2001 | 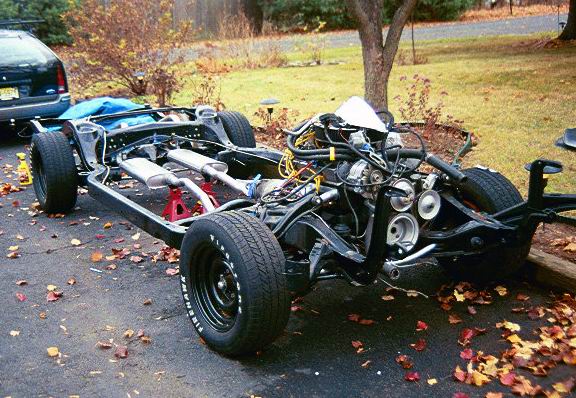 |
| There were a variety of areas where rust repair was needed. The most substantial was the rear wheel wells and the surrounding trunk and quarter panels. The wheel wells were not available so I got a donor trunk replacement that included the entire back third of the floor and wheel sells. The picture shows the body prepared and ready to receive the new part.
After this I proceeded to repair the other areas of the body shell. |
 |
| The quarter panels were then added. When removing the old ones, I cut below the body centerline crease in order to preserve as much of the shape as possible. the New quarters were aftermarket pieces and the fit was not particularly good. I used a metal shrinker/stretcher to adjust things.
I used panel adhesive around the entire bottom edge instead of welding. This was much simpler and should help seal out water. |
 |
| Hood repair - The edges of the hood were going and new ones are not available. I decided to split the hood apart and repair it. It was bonded together instead of welding. This filled the holes and waterproofed the area. | 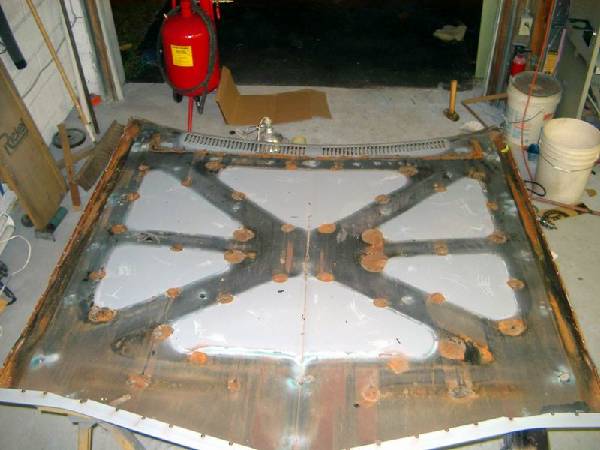 |
| Fender repair - The fenders needed the usual repair in the lower rear corners. This included rebuilding the support structure. A simple vise mounted metal bender was used to help fabricate the shapes. |  |
| Start of painting, Reassembly and Primer surfacer -
Prior to assembly the firewall and door frames were painted
Reuniting the body and frame after about a year of work.
To get the body work smooth, K36 high build primer was used over all exterior surfaces. |

|
| Painting day | 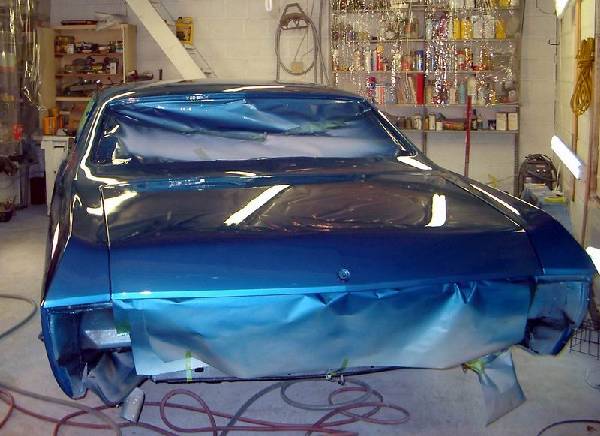 |
| Interior - The interior was completely redone with a color change from green to black. There was also some additional wiring done to include a better audio system, additional roof mounted reading lights front and rear, electronic control of the new transmission and addition of door light switches to the rear. | 
|
| Stereo | |
| Nitrous |


This page was last updated on .
![]()