The frame was in fair shape but had a crack under the trunk and the body mount holes were eroded in some spots. During the rebuild I repaired the metal, upgraded to polyurethane bushings, replaced all four springs and shocks, installed stainless brake and fuel lines. Installed a larger front sway bar and added a sway bar to the rear. I will use a rubber body mount kit. The available body mount kit does not have the proper mount for under the rear seat. When I get to that point I will have to improvise. I also lengthened the rear trans mount bracket to accommodate a 700-R4 trans.
| This is the frame after disassembly. The pictures below show some details of what was done. | 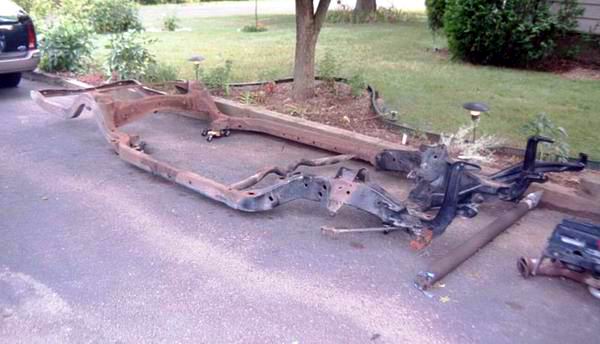 |
| The triangular reinforcement below and back from the body mount hole adds a great deal of strength. | 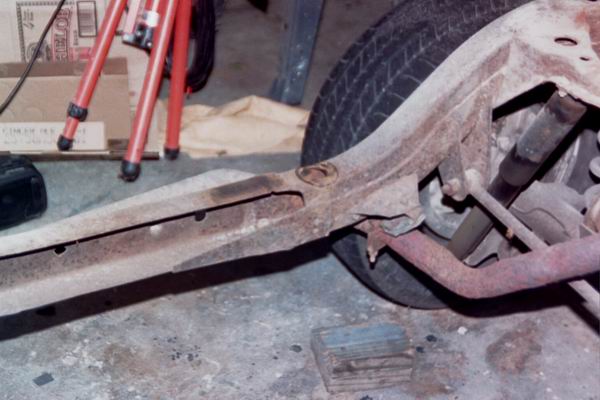 |
| The reinforcement shown above was missing in the passenger side. There was no sign it had ever been there (no evidence of welding). | 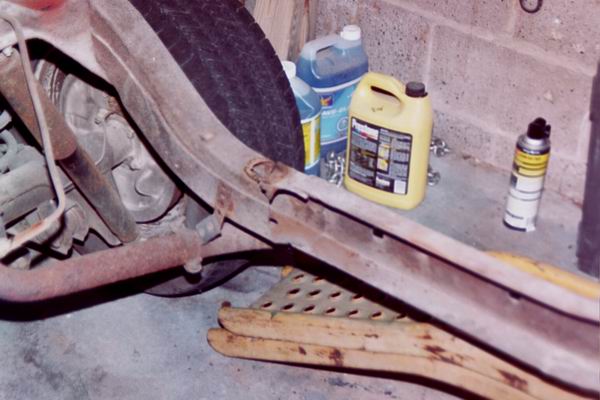 |
| Detail of crack in frame. | 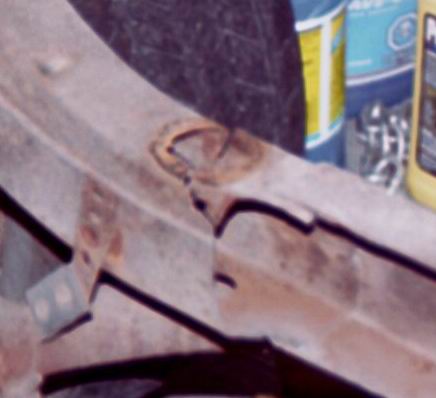 |
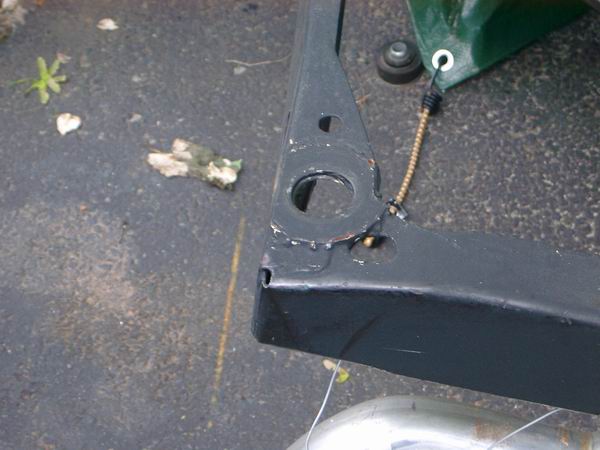
| Outside of cracked area. Note the erosion around the mounting hole. The crack was welded and reinforcement plates were welded on both sides of the damaged area. |  |
| The body mounting holes were repaired by welding very large washers to the frame, centered over the existing holes. They need to have the edges trimmed so as not to overhang the frame edges. Since they are only 1/8" thick they will have no effect on the alignment of the body on the rubber mounts.
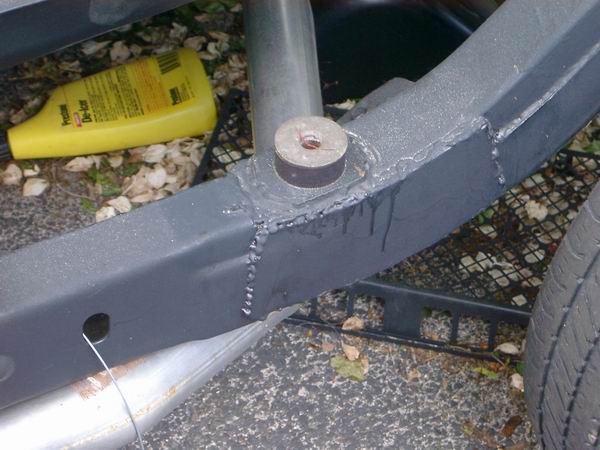
Another trouble spot is the frame rails just as they head up over the rear wheels. Water/salt/etc. collect here and the bottom of the rail rusts out. For the moment, I have left the hole on either side. The area around it still has plenty of steel and the area can now drain. If this turns out to be a bad idea, I still still have access to patch things up. |
  |
| Mystery body mount - The new body mount kit has the usual assortment of mounts but the car has one unusual set of mounts under the passenger seat in back. I will probably have to get a large rubber stopper from the hardware store and cut it to fit. |
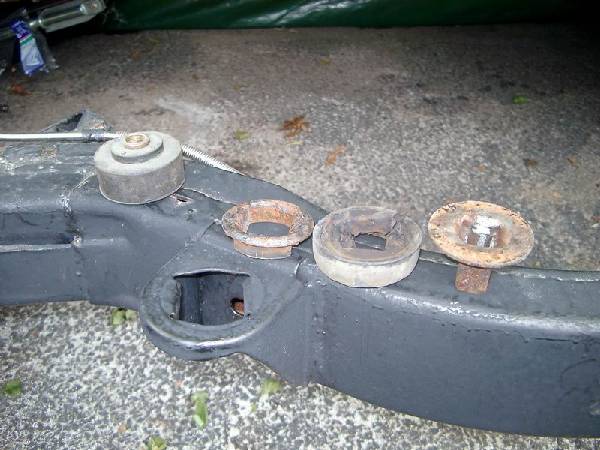 |
| The body mount kit I purchased does not have anything resembling what was under the rear mount. |  |
| Control arms sand blasted and ready for painting. To get the old bushings out, I heated the housings with a torch and pushed them out with an arbor press. |  |
| The rear control arms were rusted solid to the axle bolts. One problem is that the brake drum backing plates prevent access to the bolts to drive them out I got them out by removing the backing plate, hacking out some of the rubber from around the center sleeve of the bushing and heating the sleeve red hot. then I could drive the bolt out with a hammer and large drift pin. |  |
| Rear end ready to go back in. | 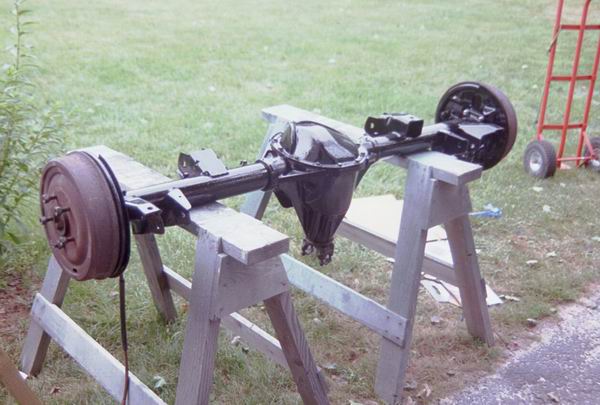 |
| The car had a stock front sway bar and no rear bar. I upgraded to a 1-1/8" front and a 1" rear bar from P-S-T. Getting the bushings over the bars was nearly impossible until I lubricated it with KY jelly. | 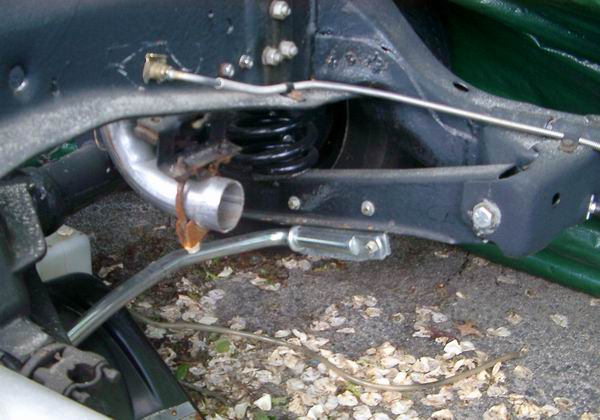 |
| Polyurethane bushings were used on all suspension points. The bushing housings rear trailing arm were not pressed into the arms fully (I presume at the factory). The new kits from P-S-T have an outer shell in addition to the inner bushing itself. This will not fit unless the housing is pressed fully into the arm. | [ADD PICTURE] |
| Ready and waiting for the body. Frame was painted with POR-15 paint | 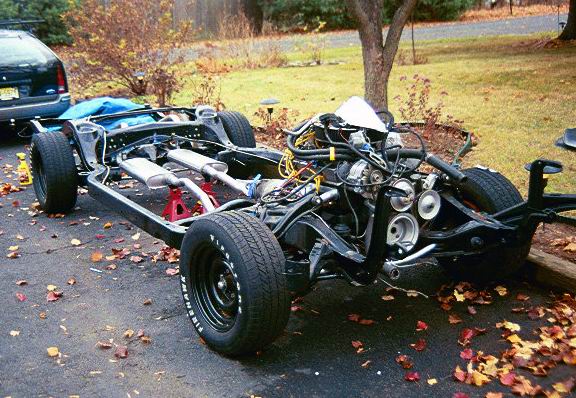 |